Christmas Village Display: Layout Ideas and What You Need
What decides a good Christmas village display is height, a clear focal point and open space, not the number of houses. Put the tallest building at the back on a 6 to 12 inch riser, step down toward the front, and leave a small open square. Keep it out of sunlight, heat vents and walkways, and use only cords rated for where they sit.
As an Amazon Associate we earn from qualifying purchases. Buttons open Amazon search results, so check the reviews, size and price before you buy. We haven't tested these products ourselves.
Quick picks
Want it by Christmas? Amazon hasn't posted its 2026 holiday cutoffs yet. Estimates put free standard shipping around December 11 to 14 and Prime around December 18 to 21. Items shipped by other sellers can take longer, so check the delivery date at checkout before you buy.
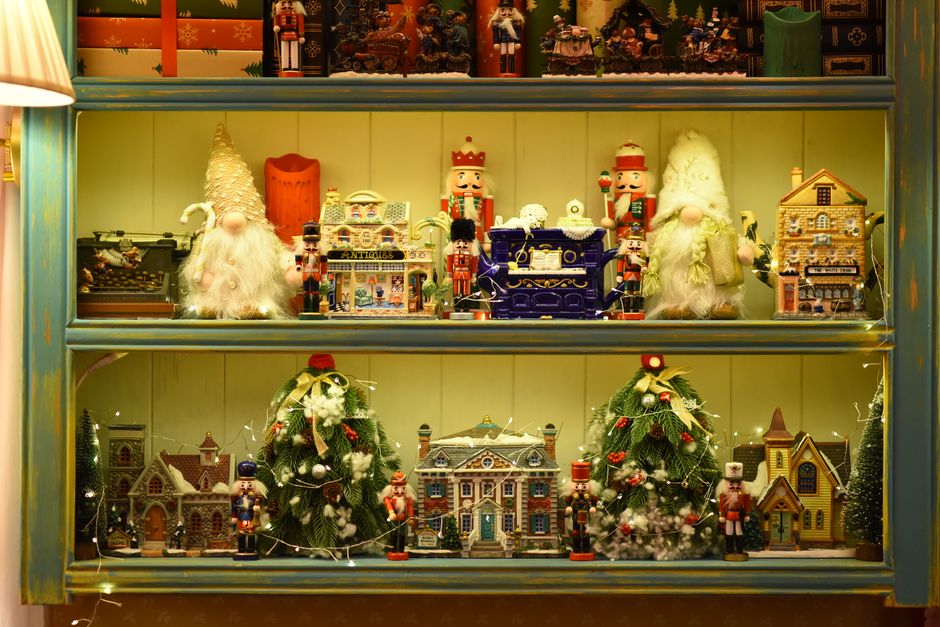
Photo by Sóc Năng Động on Pexels
What decides a good village display
Three things matter more than how many pieces you own: elevation, a focal point and empty space. One layout guide puts it simply: start with a clear story and focal point, then build elevation front to back so taller pieces sit behind shorter ones. Another says every display needs 1 to 2 main focal points, usually your largest or most detailed buildings. Everything else is placement and power.
Pick the spot first
Common spots include console tables with wall backing, sideboards with open space above, fireplace mantels if deep enough, dedicated shelving and bay window ledges. Entryway consoles, deep windowsills and piano tops also work. They provide flat surfaces for a festive display.
Avoid these locations, as listed by one village guide:
- High-traffic walkways
- Direct sunlight, which fades buildings
- Areas near heating vents
- Unstable surfaces
- Spaces where pets can reach
Build three levels
The same guide recommends a three-level approach:
- Back: large buildings and churches, elevated 6 to 12 inches.
- Middle: shops and homes, elevated 2 to 6 inches.
- Front: small buildings and figurines, at ground level or slightly elevated.
For risers, hidden boxes, sturdy books, or plywood or MDF cut to custom sizes all work. Avoid identical risers throughout. One designer notes that matching heights read as repetitive and sterile. Also check that every building stays visible from a seated eye level.
Worked example: a 60-inch sideboard
Say you have a 60-inch sideboard with a wall behind it. These numbers are an example, not a rule.
- Back: put the church or tallest building at the center rear on a 10-inch riser. That is inside the 6 to 12 inch range.
- Middle: place two medium buildings at the front corners of that cluster, each on a 4-inch riser. The sources suggest two medium buildings flanking front sides, with accessories filling the triangle center.
- Front: use small shops, trees and figures at table level.
- Repeat: make a second, smaller triangle at one end. Leave about 15 to 20 inches of the 60 open as a village square, with a single tree or fountain in it. That keeps the layout asymmetrical, and clusters beat straight lines.
The open square matters. One designer says the empty ground around the centerpiece is just as important as the decoration itself. Her advice on spacing: if every gap is identical, the village can look rigid; if there are no gaps at all, it looks crowded. For a dense city look, arrange buildings with minimal gaps to achieve a rowhome look.
Comparing display bases
| Base | Best for | Watch out for | Cost level | Shop |
|---|---|---|---|---|
| Books and boxes under fabric | Mantels and shelves, easy height changes | Can shift; secure with tape or museum putty | Lowest | |
| Cut plywood or MDF platforms | Custom fits on long tables | Needs cutting and covering | Low | See options |
| Modular tiered stand | Corners and round layouts | Check the stand's load guidance, as larger buildings go by the stand's load limit | Medium to high | See options |
| Existing shelves or a hutch | Small collections | Limited depth | Free |
Landscape and lighting
Snow blankets, flocked trees and paths tie pieces together. Curved walkways, bridges and open snow lanes guide the eye and make the village feel real. Under a full-size tree, a low platform keeps buildings from disappearing under low branches, and a snow blanket or tree skirt joins the two scales. Add flocked bottle brush trees for texture and keep tall structures at the back.
See snow blankets for villages
For lighting, warm white is the usual choice. One source recommends adjustable picture lights with warm 2700K bulbs positioned above each elevation level. Most village houses are lit from inside, so plan where cords will run before you place buildings.
Power and safety
Village displays are small, but cords add up. ESFI advises to inspect all lights, decorations and extension cords for damage before using. Check that indoor and outdoor electrical decorations are turned off before leaving home or going to sleep. A timer or smart plug makes that easier.
- No daisy chains. Extension cords should never be plugged into other extension cords because they can overheat and cause a fire.
- Do not hide cords. Do not run cords under rugs; heat can build up around covered cords.
- Tuck neatly. One layout guide suggests to tuck power strips behind the display and use cord clips to keep wires flat against the table.
- Outdoor villages: Make sure all extension cords and electrical decorations used outdoors are marked for outdoor use. They should also be plugged into GFCI-protected circuits. Keep cords clear of snow and standing water.
Common mistakes
- Overcrowding. One guide states more buildings does not mean a better display. Store extras or build a second vignette elsewhere.
- Everything at one height. A flat row reads as a shelf, not a town.
- Ignoring scale. Keep figures and trees in proportion to nearby buildings.
- Using it everywhere. Concentrating the collection creates more impact. Small homes can instead separate pieces into little village scenes throughout the house.
- Skipping a stored-cord check. Decorations kept in attics or basements can face fluctuating temperatures and chewing mice or squirrels.
Setup order
- Measure the space and clear the spot.
- Sketch a plan with a focal point and a village square.
- Set risers, then cover them with a blanket or batting.
- Place the largest buildings first, then medium, then small.
- Run cords behind the display and clip them flat.
- Add trees, figures and paths last, then check sightlines from a seated position.
We have not tested the products linked here, so check dimensions, load limits and cord ratings on each listing before buying.
Common questions
How tall should the risers be in a Christmas village display?
One village guide suggests 6 to 12 inches for the back level with the tallest buildings, 2 to 6 inches for the middle level, and ground level for the front. Vary the heights rather than using identical risers.
Where should I put a Christmas village if I have no mantel?
Use a sideboard, entryway console, deep windowsill, piano top or bookshelf. Keep it away from heating vents, direct sunlight, busy walkways and anywhere pets can reach.
How do I arrange village houses so they look natural?
Group them in triangular clusters with one tall building at the back and medium buildings at the front corners. Leave an open village square and uneven gaps, and add paths or snow lanes to guide the eye.
Is it safe to leave village lights on overnight?
ESFI advises turning off indoor and outdoor electrical decorations before leaving home or going to sleep. A timer or smart plug can handle this automatically.
Can I display a village outdoors?
Yes, if the lights and cords are marked for outdoor use, plugged into a GFCI-protected circuit, and kept clear of snow and standing water. Indoor-only lighted pieces should stay inside.
Sources
More guides
- Christmas Tree Ornaments: How Many You Need and Which Kind
- How Many Lights for a Christmas Tree? Sizing by Height
- Black Friday Christmas Tree Deals: What to Check Before You Buy
- Outdoor Christmas Inflatables: Size, Power and Wind Tips